As I’ve written about before, I’m a strong fan of the Genesis framework for WordPress websites. It’s fast, flexible and has stellar support and themes. Of the last five websites that I’ve completed, all have been built off the Genesis Framework.
Naturally, given my time spent doing SEO for all types of websites, I like Genesis even more because of how well it handles default settings, technical markup and its very clean codebase. After dealing with others who are very familiar with the Genesis framework, I’ve found that most have a solid grasp on the settings that Genesis has by default — but for the best SEO setup, I’d thought I would share how I setup a Genesis website for maximum impact in search. Let’s walk through the best Genesis SEO setup for you.
Default? Not Perfect
While you can use the default SEO settings with the Genesis framework, I don’t think there is any reason to. They don’t have the same level of flexibility as a SEO plugin like Yoast and lack extra needed features. If you are set on not using a plugin to handle the details like sitemaps, indexing control and more, then you’ll probably be fine using the default settings. However, I’m going to strongly recommend you install a plugin to handle the SEO of your Genesis website.
Which Plugin To Use?

In the Wordpress SEO world, there’s two or three main plugins that compete for the top spot in the downloads chart. I think the choice is clear: Yoast WordPress SEO.
While other plugins out there all offer pretty much the same thing, none offer the polish and level of feature iteration than the Yoast team puts into their SEO plugin. With updates happening almost every few weeks adding great new features or squashing bugs, the Yoast team is on the cutting edge ofWordPress plugin development. I’d recommend starting by installing the YoastWordPress Plugin on your Genesis-powered website.
Yoast Plugin Settings
Once installed, the plugin has a fairly large amount of options – 12 dropdowns accompany the plugin installation with each section containing a few tabs for various sub-settings. I’ll walk you through my default settings for each section.
Dashboard
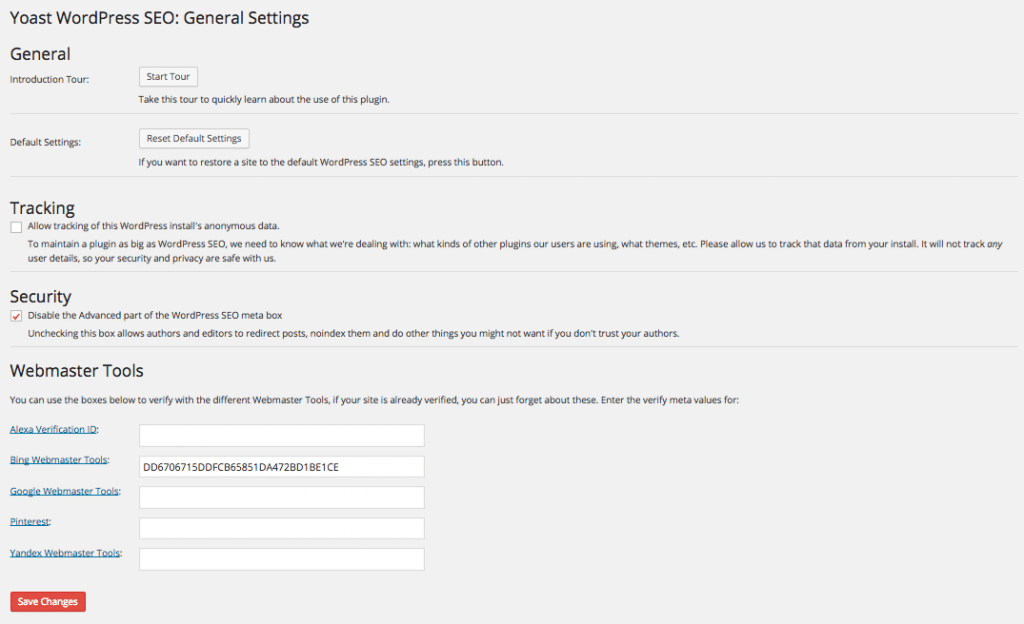
The first area you interact with, the dashboard is the place where you’ll set the common settings within the plugin. Here are my settings for my websites and the reasons for them:
I have setup verifications with Google Webmaster Tools, Bing Webmaster Tools as well as Pinterest. These verifications are helpful to setup the sitemaps (in the case of Google & Bing) and verification I’ll show you later on.
Titles & Metas
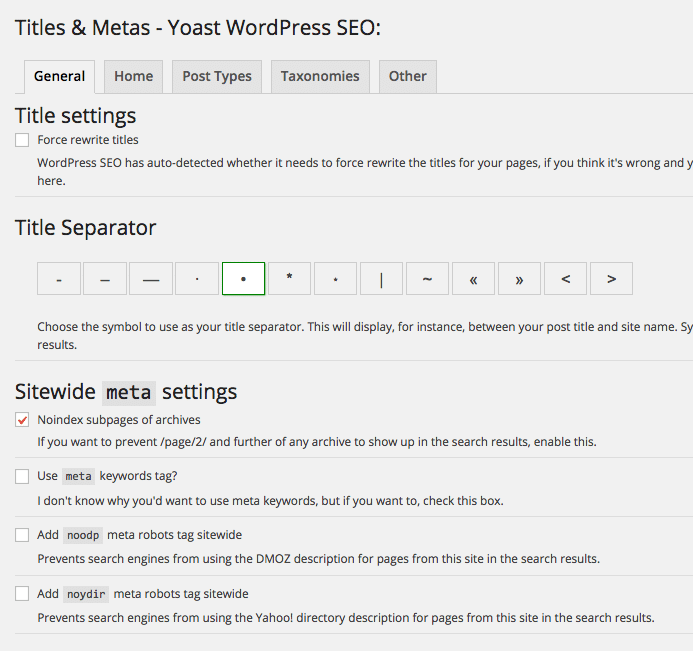
In this screen, I have two settings that I like to tweak to my liking. First off, I always noindex subpages like so: /page/2/. These pages are often just duplicate content and reduce your crawl budget on pages that aren’t important. I’d rather have just my core, original and quality pages indexed in Google and Bing — not any thin or duplicate pages.
The next setting that seems minor but I like to change is the separator. Lots of SEOs include the brand name in every title tag (I do for the overwhelming majority of client websites as well). Usually, we’ll add a separator before the brand name to tell Google or Bing that’s where our name starts. I like the bullet separator. Zero logic in this, I just like the way it looks and reads on the screen. Pick the one you like best.
Post Types
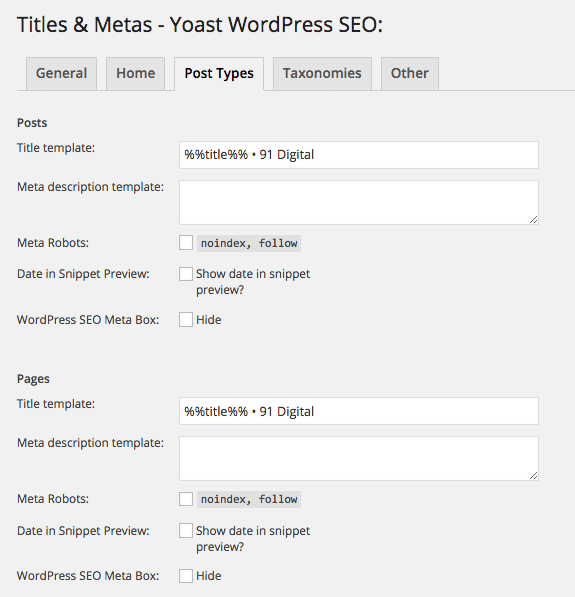
When creating a new page or post in WordPress, a title will be generated based on the settings here. Of course, you can change it with the SERP snippet preview tool under the page or post as well if you’d like. But, the settings here mean you’ll get a pretty good page title or post title between the <title> tags. Here are my preferred settings for a nice search engine friendly page title that’ll fit close in the pixel count before truncating.
Taxonomies
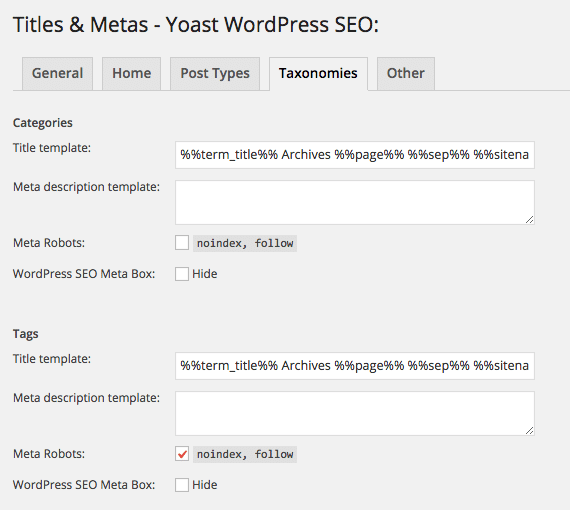
Taxonomies is just a fancy word for your tags and categories and how you want to index them. For the most part, you should pick 5-10 top level categories and use those pretty exclusively (for most websites). However, you may also use tags sparingly when it makes sense to do so. My personal opinion here is to be careful — you don’t want to add dozens of tags, generating as many pages in the process and diluting the strength of each post. If you don’t post a lot of new blogs a ton, I recommend using only categories and not tags. If you feel that you do want to use both categories and tags, don’t keyword stuff and make sure enough content is being posted to justify the use of each category and tag.
On my personal site, I noindex tags (don’t use anyways) and categories (no strong reason to index them) because I want each post to have the maximum strength and keep the indexed pages squeaky clean. Just know here to be careful because adding tags and categories is creating a page and these are often very thin in the eyes of Google.
Social
While not directly SEO related, social markup within the Yoast plugin is fantastic for adding support for Twitter cards as well as creating the best-possible quality link image previews in Facebook and Google Plus. Pay close attention to these settings if your posts generate any social shares whatsoever. Adding in the correct settings helps generate more clicks and shares on your posts.
Sitemaps
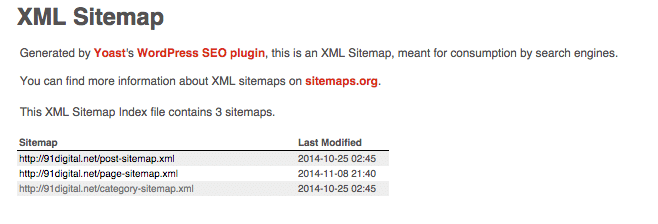
A very important reason to use Yoast’s plugin is the very clean and powerful built-in sitemap generator. The sitemap file can be found at your websites root /sitemap.xml. This file contains the correct markup for search engines to crawl the correct pages on your site in the most effective way possible. The plugin will break down which users or authors you want a sitemap for and what content types to include. I suggest mirroring the settings from the Taxonomies section above here. Don’t put sitemaps out there for anything you don’t wanted indexed — but do make sure to include a sitemap file for anything you do want indexed. Match these up and Google will be crawling and indexing your website in no time.
Permalinks
Different from the WordPress permalink settings (which I strongly advise you to use /postname/), this can control a few extra things. The only setting I ever feel the need to use is the remove stop words option.
Internal Links

A nice way that Genesis and Yoast’s plugin work together here is with breadcrumb support. You can choose the visual separator and carefully setup how the breadcrumbs appear on the site. I really like the breadcrumb functionally in Genesis because it also gives a unique look on the SERP with these links.

A Match Made In SEO Heaven
As you can see, setting up your Genesis theme with WordPress SEO by Yoast is a pretty quick experience. It saves you hours of time versus any other WordPress theme and plugin combo. No need to worry about all the little details like Schema markup, indexing rules or even another plugin for sitemap files. If you have any questions or have any thoughts on how to setup Genesis for SEO success, feel free to reach out.