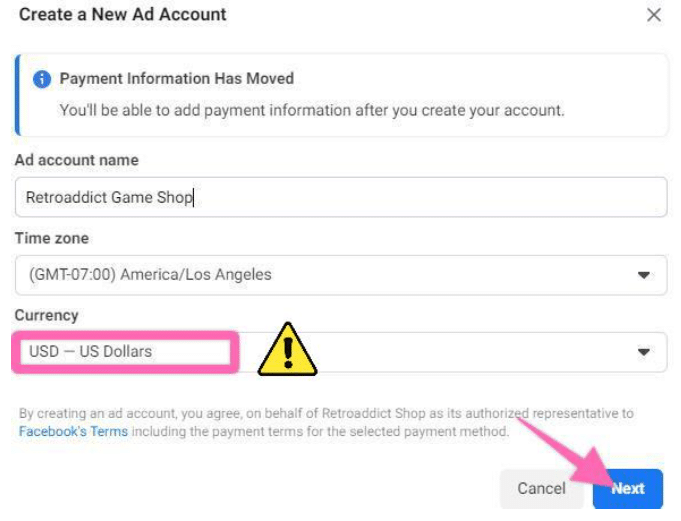
Note: Pay attention to the currency you want to be used for your account as you cannot edit this in the future. You can always create a new Ad Account If you want to do so.
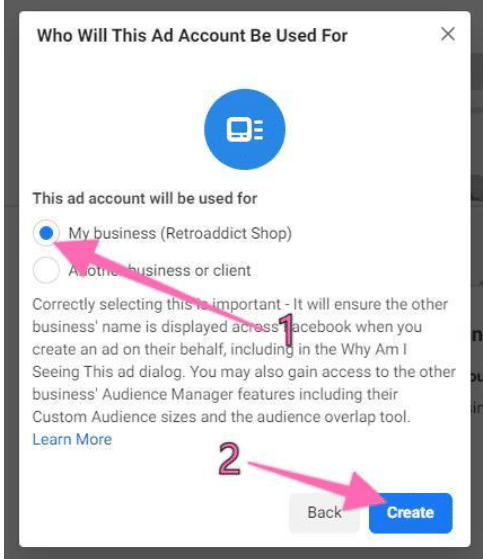
5. Select whether you are creating this Ad Account for your business, or to advertise on behalf of another business.
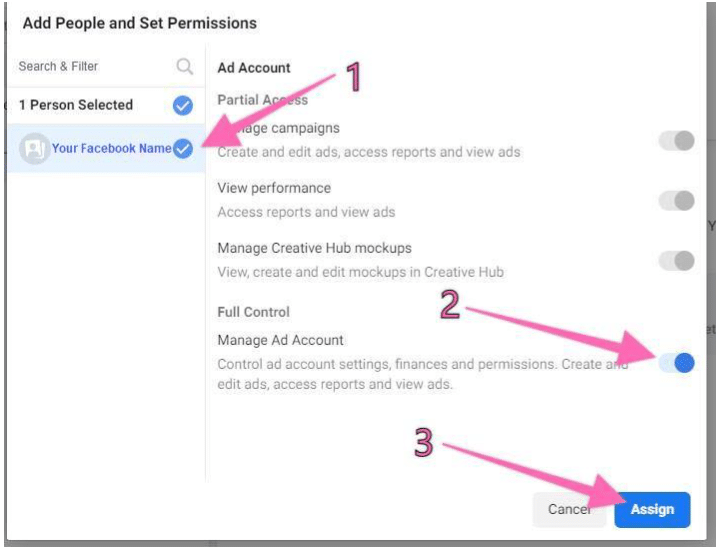
6. You will now be prompted to assign people to your Ad Account, for now, you will only add yourself.
In the future, you might want to add employees or contractors to that Ad account as well.
7. Your ad account has been created!
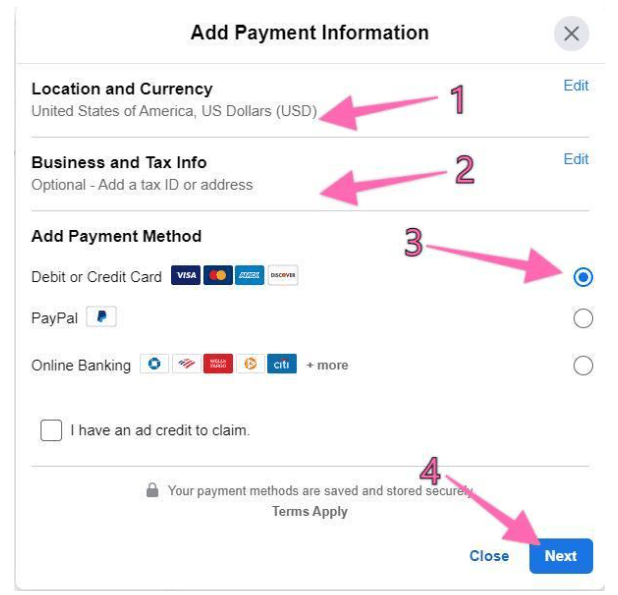
If you don’t have a Payment Method set up, you will want to do it now. Click on ‘Add Payment Info’:
8. Make sure your ‘Location and Currency’ is correct, you can fill up your ‘Business and Tax Info (optional), choose your preferred payment method, then click on ‘Next’:
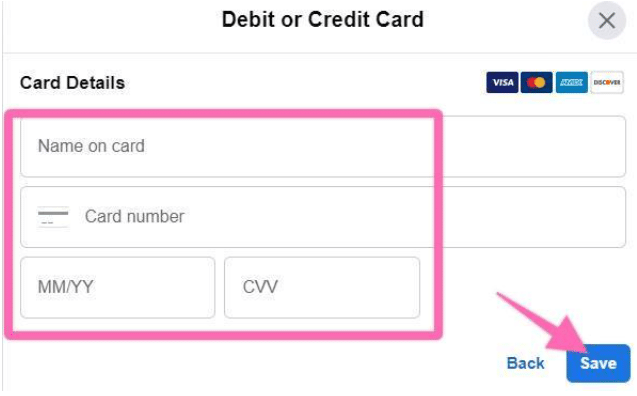
9. Input your credit/debit card details.
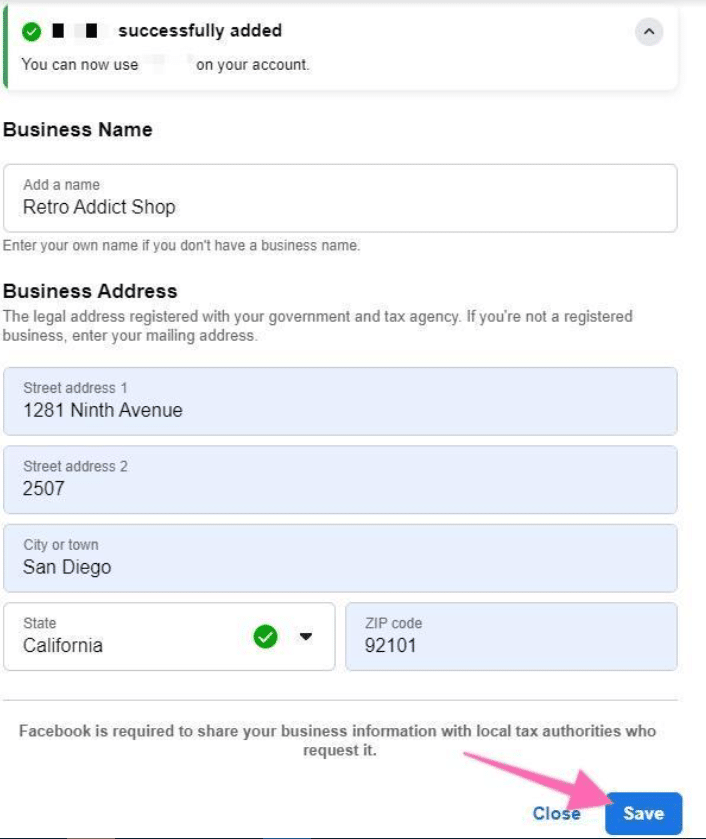
10. After successfully adding your credit card details, you can now input your business address details.
That’s it, you have now successfully created you Facebook Ads account!